Images of Handmade Paper
Selections from the website master's collection
1. Taipei, Taiwan. Marbled paper. Kuo-Tsai Wang. Taiwan Forestry Research Inst., Taipei. Each 78 mm x 45 mm.


2. USA. The Earth Drum. David Russell. New York City. 10 inch diameter playable drum.

3. India. Tree-free Cards and Envelopes. 5″ x 7″.

4. Japan. Awagami Factory. Tokushima. Part of 320 mm x 450 mm sheet shown.

5. Canada. Brian Queen. Castle Papers. 5.5″ x 8.5″.

6. USA. Carol Kovler. Creates from the fiber of her being. New York. 9.5′ x 6″.

7. Michigan. Sally Rose. Central Michigan Univ. Pigmented cotton/abaca with rayon threads. Approx. 5.5″ square.

8. British Columbia. Art Liestman. From home-made soda-semichem maple pulp. 7.25″ x 2.25″.

9. Thailand. Mulburry paper. 5.5″ x 6″ as folded.

10. South Carolina. Elizabeth Lamb. Kozo, Gampi, Douglas Isis spp, Sedge spp & Orchid leaves. 7″ x 5″.

11. Iowa. Linda Elkins. Very old unbleached cotton, abaca, and bits of silk. Blender mixed with CMC. 9″ x 5.75″.

12. Hand-made paper fan. Taipei, Taiwan. Papertown, No.5, Lane 38, Tian-Yu St.; FAX 02-28747651

13. “Big Ben” impression on handmade paper; Japan

14. Classic papermaking technology book from India, printed on hand-made paper, All India Village Industries Assoc., 1948.

15. Various hand-made paper art from the Friends of Dard Hunter “The Magic of Paper” conference, Nov. 4-6, 1999

16. My contribution to the 2003 gift exchange at the Friends of Dard Hunter conference.

I’ve long been fascinated by the swirling eddies produced by jets of water. As a paper scientist I’ve also been fascinated by how quickly such swirling motions die down in the presence of fibers. Recently I found a cool way to capture some of these swirling motions by a method that I will call the “submerged jet” method. The accompanying exhibit was formed by this method, and I am hoping that the method could produce even more interesting effects and designs in the hands of an artisan. So here’s a description of how this exhibit was prepared:
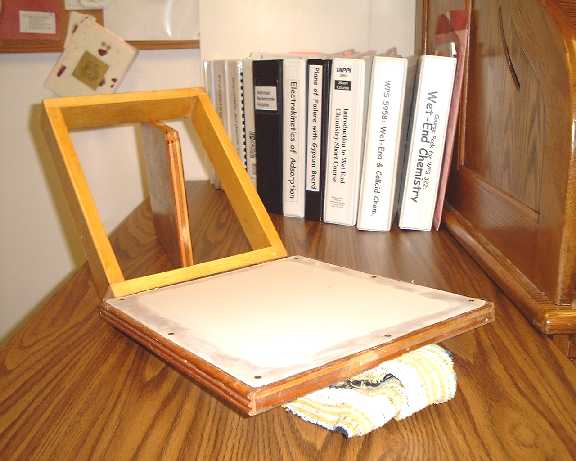
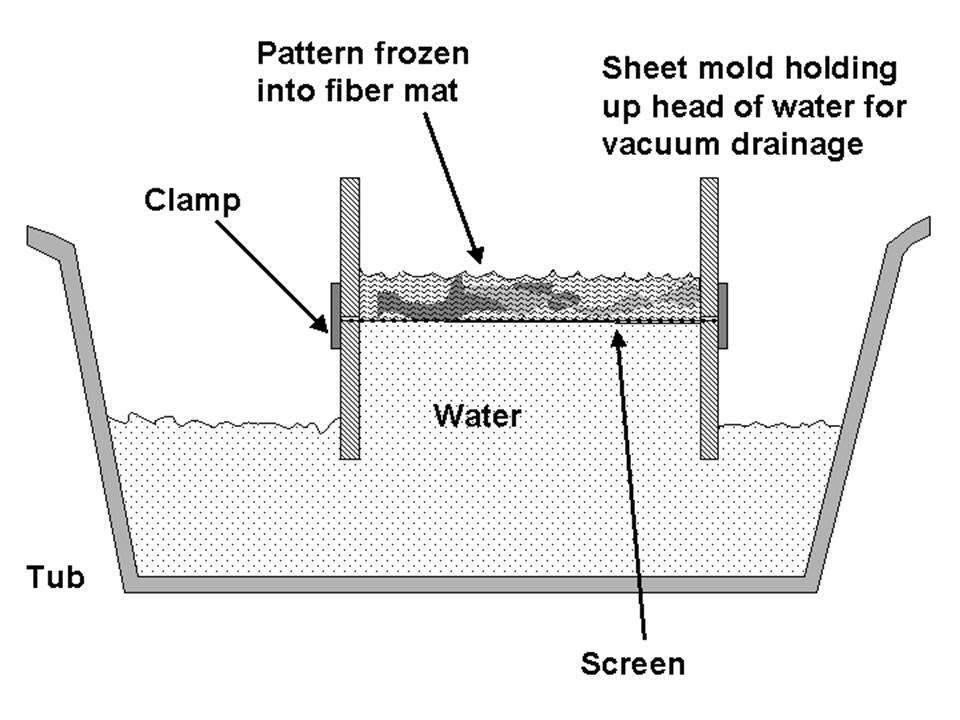
As shown in Fig. 2, the key to achieving the effect is the use of a syringe to “jet” a slurry of deeply colored fibers below the surface of a slurry of white or tinted fibers. This was done, in this case, with a “pour” type of sheet-forming mold consisting of two rectangular frames, one covered with a screen. The two frames are held together during sheet forming by two clamps. The frames are submerged in a pool of water so that water rises about ½ inch (2-3 cm) above the screen.
A slurry of white or tinted fibers is then added above the screen, aiming for a solids content of about 0.3 to 0.7%. Gentle back-and-forth motions with a spatula were useful to even out the slurry, especially in the corners of the rectangular space.
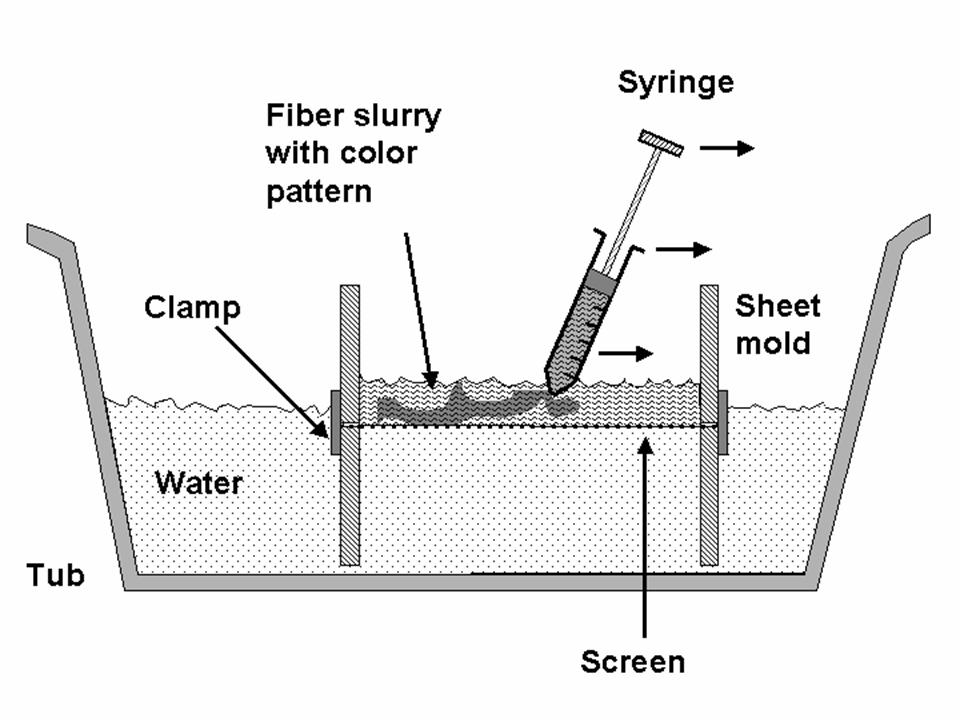
Next a syringe was used to inject about 20 ml of deeply colored red fibers, at about 1.5% solids, below the surface, with simultaneously motion in a sweeping circular motion parallel to the plane of the screen. The “submerged jet” step was then repeated, similarly, with a slurry of deep-blue fibers.
Various approaches were used to fix the dye to the fibers. Since the red dye was a conventional anionic direct dye (Direct Red 254) having relatively low affinity for bleached kraft fibers, the red fibers were prepared by first adding the dye, and then adding either aluminum chloride or low-mass poly-diallyldimethylammonium chloride (DADMAC). The latter fixative proved to be much more successful. Since the blue dye was a cationic direct dye (Fastusol C Blue 76L), it was not necessary to use any fixative.
How to Achieve Different Effects
Some of the factors that I found to affect the results of “submerged jet” paper art include the preparation of the syringe tip, the relative speed with which the color fiber slurry is squeezed out of the syringe, the solids content of the fiber suspension in the sheet mold, and the amount of dye fixative used.
Preparation of syringe tip: My approach was to just cut off the tip of each plastic syringe with a razor knife, leaving a rough opening about 2-4 mm wide. This alteration allowed the colored fibers to spread out into more interesting patterns. Also, it minimized a tendency of jetted fibers to impale themselves onto the screen surface, leaving a clearly visible pattern even after the wet sheet had been taken away.
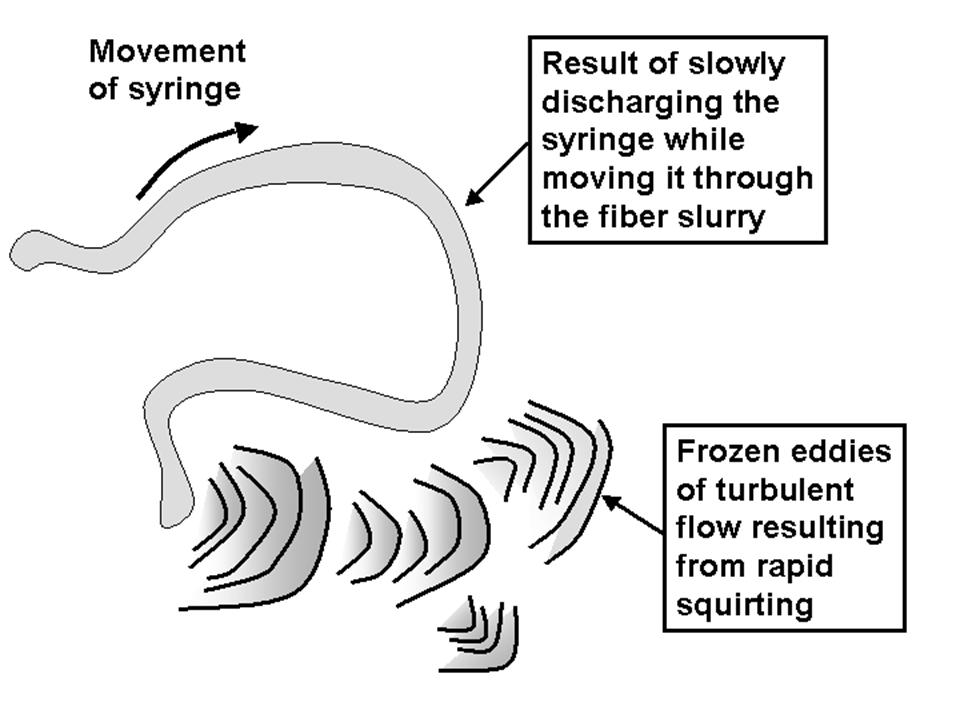
Speed of discharge of the jet: As shown in the third figure it was possible to achieve a wide range of effects. At very low speeds of discharge of the syringe, approaching laminar flow, it was possible to draw relatively narrow lines (see also the comment below regarding the solids content of the fiber suspension). Rapid jetting, by contrast, produced more impressionistic patterns. Turbulent eddies of flow became frozen in the paper.
Solids content of the slurry: The most interesting effects were achieved only within a certain range of solids of the suspension initially placed above the forming screen. I estimated that the most interesting range of solids (or “consistency”) was between about 0.4% and about 1%. Also it helped if the fibers had been made more flexible by refining (which could be achieved by use of a blender for a minute or two). But I think that you can get a pretty good feel for whether the solids content is in the right range by observing whether there are enough fibers present to form a contiguous mat, causing motion to cease within one or several seconds after injection of colored fibers.
Amount of fixative: You can expect rather different effects depending on whether the dye is fixed to the fiber or whether it is mainly present in the water. In fact, it would be interesting to simply inject dye solutions directly. I observed that crisper patterns – and less issues concerning cleanup – resulting when the dye had been firmly fixed onto the fibers in the suspension.
Comments welcome: At the Department of Wood and Paper Science at NC State University our main focus usually is on the science – not the art – of paper manufacture. However, I am very happy to give input on paper handcraft projects. There has been a huge amount of progress in the science of mechanized papermaking, and, who knows, some of those scientific findings might be useful in paper art.